Deck Restoration: The Complete Guide to Bringing Your Outdoor Space Back to Life
Your deck is more than just an outdoor structure — it’s an extension of your home, a place for gatherings, relaxation, and memories. Over time, however, exposure to the elements can leave even the most well-built decks looking dull, cracked, or weathered. That’s where deck restoration comes in. Restoring your deck not only enhances its appearance but also extends its lifespan, ensuring it remains safe and beautiful for years to come.
In this complete guide, we’ll cover everything you need to know about deck restoration — from identifying signs of damage to choosing the right materials, performing repairs, refinishing, and ongoing maintenance tips. Whether you’re a DIY enthusiast or planning to hire professionals, this post will walk you through the essential steps to achieve a flawless result.
What Is Deck Restoration?
Deck restoration refers to the process of repairing, cleaning, refinishing, and sometimes rebuilding parts of a deck to bring it back to its original or improved condition. Unlike simple cleaning or staining, restoration involves addressing structural issues, replacing damaged boards, sanding, and sealing to protect the deck from moisture, UV rays, and wear.
Restoration may include:
- Replacing rotten or splintered wood
- Sanding and stripping old finishes
- Applying protective stains or sealants
- Power washing and deep cleaning
- Fixing loose nails, screws, and railings
- Repainting or refinishing the surface
The main goal is to restore both the beauty and safety of your deck, ensuring it can withstand years of use and exposure.
Why Deck Restoration Is Important
Deck restoration isn’t just about aesthetics — it’s also about preserving value, safety, and durability. Here are the key reasons you should consider restoring your deck:
1. Enhances Curb Appeal
A well-maintained deck instantly improves the overall look of your home. Whether you plan to sell your property or just enjoy it for yourself, a freshly restored deck adds charm and visual appeal.
2. Prevents Costly Repairs
Neglecting your deck can lead to severe structural damage over time. Small cracks or rot can worsen quickly, requiring full replacements. Regular restoration helps catch and fix issues early.
3. Improves Safety
Loose boards, nails, and decaying wood can become hazards. Restoring your deck ensures it remains safe for family, children, and pets to enjoy.
4. Extends Deck Lifespan
Wood decks, especially those made of cedar or pressure-treated lumber, can last decades with proper care. Restoration rejuvenates the material and protects it from further damage.
5. Boosts Property Value
Real estate experts agree — outdoor living spaces increase home value. A newly restored deck can make your home more appealing to buyers and increase resale value.
Signs Your Deck Needs Restoration
Knowing when to restore your deck can save you time and money. Here are some telltale signs it’s time to act:
- Discoloration or fading: The deck looks gray, dull, or uneven in color.
- Splintering or cracking boards: Indicates weather damage or dryness.
- Soft or spongy spots: Signs of wood rot or water infiltration.
- Loose fasteners or railings: Safety risk that needs immediate attention.
- Peeling paint or stain: The protective coating has failed.
- Mold, mildew, or algae buildup: A sign of poor drainage or moisture.
- Warped or cupped boards: Often caused by prolonged sun exposure or moisture.
If you notice two or more of these symptoms, it’s time for a full deck restoration.
Step-by-Step Guide to Deck Restoration
Restoring your deck can be a rewarding project if done properly. Below is a detailed step-by-step guide to help you through the process.
Step 1: Inspection and Preparation
Before starting, inspect your deck thoroughly. Look for damaged boards, loose nails, or rusted screws. Mark any areas that need repair.
Next, clear the area — remove furniture, planters, grills, and debris. Sweep away leaves and dirt.
If your deck is close to plants or grass, cover them with plastic sheeting to protect them from cleaning chemicals or stains.
Step 2: Deep Cleaning
Cleaning is a crucial part of deck restoration. Use a deck cleaner or wood brightener to remove dirt, mildew, and old finishes.
You can use:
- A deck cleaning solution applied with a sprayer or brush.
- A pressure washer (use low pressure to avoid damaging the wood).
Rinse thoroughly and allow the deck to dry completely for at least 24–48 hours before moving to the next step.
Step 3: Repairs and Replacement
After cleaning, examine the deck again. Replace any rotten, cracked, or warped boards. Tighten or replace loose screws and nails with weather-resistant ones (like galvanized or stainless steel).
If your railing or steps feel unstable, reinforce them with new brackets or supports.
This stage ensures your deck is structurally sound before you refinish it.
Step 4: Sanding the Surface
Sanding smooths out rough areas, removes splinters, and prepares the surface for staining or sealing. Use a power sander or orbital sander for best results.
Recommended sandpaper grits:
- 60–80 grit: For removing old finishes.
- 100–120 grit: For smoothing surfaces before staining.
Always sand in the direction of the wood grain to avoid scratches. After sanding, sweep or vacuum the deck to remove dust.
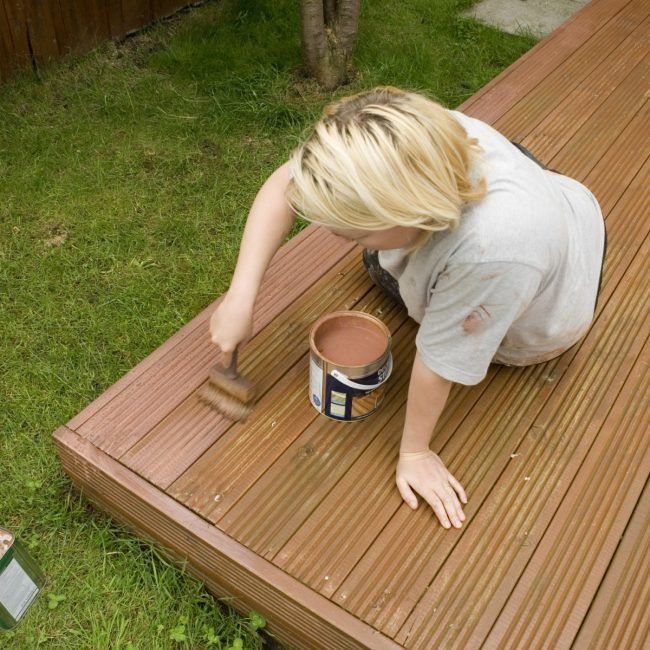
Step 5: Staining or Sealing
Now it’s time to give your deck a fresh look and long-lasting protection.
- Stains add color while allowing the wood’s texture to show through.
- Sealers are clear and provide a water-repellent finish.
- Paints offer bold color but may hide the wood grain.
Choose a high-quality, UV-resistant product designed for exterior decks. Apply using a brush, roller, or sprayer.
Allow the first coat to dry completely before applying a second coat for durability.
Step 6: Curing and Finishing Touches
After staining or sealing, allow your deck to cure for at least 48 hours before placing furniture or walking on it.
Once cured, inspect the deck under sunlight to ensure even coverage and touch up any missed spots.
You can also enhance your deck with finishing touches such as:
- New furniture or cushions
- Outdoor rugs
- LED or solar lighting
- Planters and decorative railings
DIY vs. Professional Deck Restoration
You might be wondering whether to restore the deck yourself or hire a professional. Here’s a quick comparison to help you decide:
| Aspect | DIY Deck Restoration | Professional Restoration |
|---|---|---|
| Cost | Lower (only materials & tools) | Higher (labor + expertise) |
| Skill Level | Moderate to advanced | Professional-grade results |
| Time Required | Several days | Usually 1–2 days |
| Finish Quality | Depends on experience | Smooth, even, long-lasting |
| Safety | May lack proper equipment | Professionals follow safety codes |
If your deck only needs cleaning and refinishing, DIY restoration is manageable. However, for extensive rot, structural damage, or large decks, it’s best to hire professionals to ensure quality results.
How Often Should You Restore Your Deck?
Generally, decks should be cleaned and resealed every 1–2 years depending on your local climate. Full restoration may be needed every 5–7 years if your deck shows signs of wear or fading.
Wood type also matters:
- Cedar and redwood: Require frequent maintenance due to natural softness.
- Pressure-treated lumber: More durable, needs restoration less often.
- Composite decking: Requires minimal restoration but still benefits from cleaning and UV protection.
Maintenance Tips After Restoration
To keep your newly restored deck in top condition, follow these maintenance tips:
- Sweep regularly to prevent dirt buildup.
- Clean spills immediately to avoid staining.
- Inspect annually for loose nails or cracks.
- Reapply sealant every few years for protection.
- Avoid rugs with rubber backing, as they trap moisture.
- Trim nearby plants to improve airflow and reduce mold.
- Cover or store furniture during winter months.
Consistent care will ensure your deck looks fresh and lasts longer.
Conclusion
Deck restoration is one of the most effective ways to revive your outdoor living space. Whether your goal is to restore faded wood, fix structural issues, or simply refresh the appearance, following a proper restoration process ensures lasting beauty and safety.